Making Biscornu
This pincushion or scissor keeper shape has become very popular over the past couple of years and I thought it was time I jotted down a few notes. The word biscornu is French and refers to something that is irregular or quirky. The shape of a biscornu looks very clever but is actually constructed from two square pieces of fabric and are very simple to make. There are plenty of opportunities to try making this exciting shape either as a pincushion or scissor keeper - just go to Biscornu,Watbos and Scissor Keepers

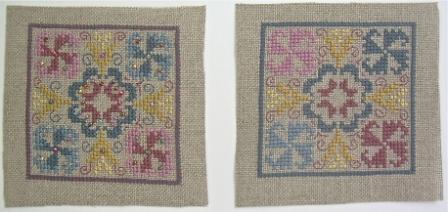
Beaded Pinwheel Biscornu
The trick when designing something that is going to be made up in this way is to remember that the interest in in the corners of the square not in the centre. A normal pincushion shape may have the main design in the middle of the square piece of fabric but this is where the buttons are placed when creating a biscornu. The free chart for this sweet little pincushion is included further down the page with suggested thread colours and optional beads. This version is worked on 28-count unbleached Cashel linen but this pattern could be worked on Aida fabric if preferred.
Complete the stitching on two pieces of fabric - the design must be square and stitched on the same thread count fabric or the pieces will not fit together. Check for missed stitches and press on the wrong side.
Trim away the excess fabric allowing just 1-5cm seam allowance and then finger press along the border of the stitching. You may find having an iron handy at the this stage but be careful not to crush your stitches on the right side. Fold in the raw edges and repeat on the second piece of stitching.
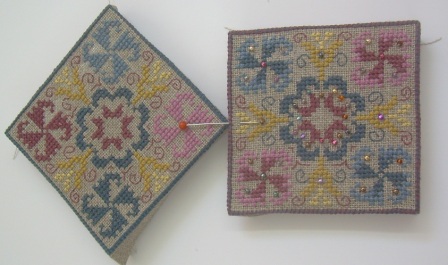
Lay one piece of stitching on a clean flat surface wrong side down and line up the other section so that the corner of one lines up with the middle of the other. Using matching thread, join the two pieces of stitching, working in to the cross stitch border and keeping your stitches neat and tiny! You could, of course, work the border in long legged cross stitch joining the sections at the same time. I have to admit to not being very good at this! Keep working around the project, matching corners and middles until you are on the final side.
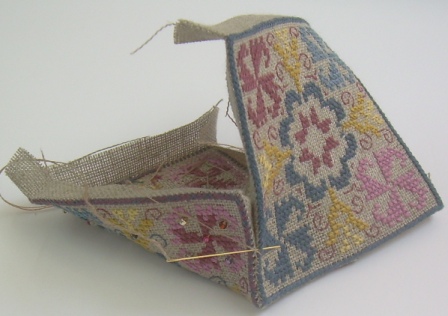
Now stuff really well at this point making sure that it is nice and plump. I have used kapok, raw silk, rice and polyester wadding, all with great effect. Complete the last side and finish off firmly. Now add the two buttons, one on each side making sure you pull really tight as this does make a difference to the overall appearance. I have used fine nylon fishing wire for this exercise with some success.
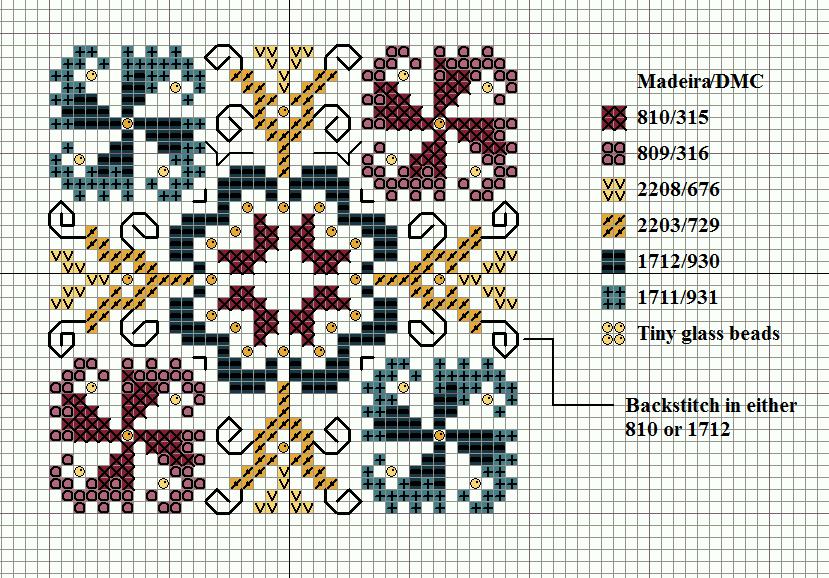
Beaded Pinwheel Biscornu Chart